

STEP1:プロジェクトの準備
npx nuxi init <project-name>
cd <project-name>
yarn
STEP2:Piniaのインストール
yarn add pinia @pinia/nuxtSTEP3:nuxt.config.tsへの追記
nuxt.config.tsのmodulesへ以下のように@pinia/nuxtを追記します。
export default defineNuxtConfig({
  modules: [
    '@pinia/nuxt'
  ]
})
STEP4:使えるかの確認
カウンター用のストアを1つと、ページを2つ用意することで、Piniaが動作していることを確認します。
こちらのstores/counter.tsではPiniaで状態を管理するためのstoreを定義しています。
import { defineStore } from "pinia";

export const useCounterStore = defineStore('counterStore', {
    state: () => {
        return {
            'counter': 0
        }
    }
})app.vueではページのルーティングが行えるように、<NuxtPage /> を使用します。
<template>
  <div>
    <NuxtPage />
  </div>
</template>
pages/index.vue では下のように、カウンターをインクリメントするためのボタンも配置しておきます。
<script setup>
import { useCounterStore } from '~/stores/counter'

const counter = useCounterStore()
</script>

<template>
    {{ counter.counter }}
    <button @click="counter.counter++">button</button>
    <NuxtLink to='page2'>page2</NuxtLink>
</template>pages/page2.vueはカウンターを表示するだけのページになっています。
<script setup>
import { useCounterStore } from '~/stores/counter'

const counter = useCounterStore()
</script>

<template>
    <div>
        {{ counter.counter }}
    </div>
    <NuxtLink to='/'>index</NuxtLink>
</template>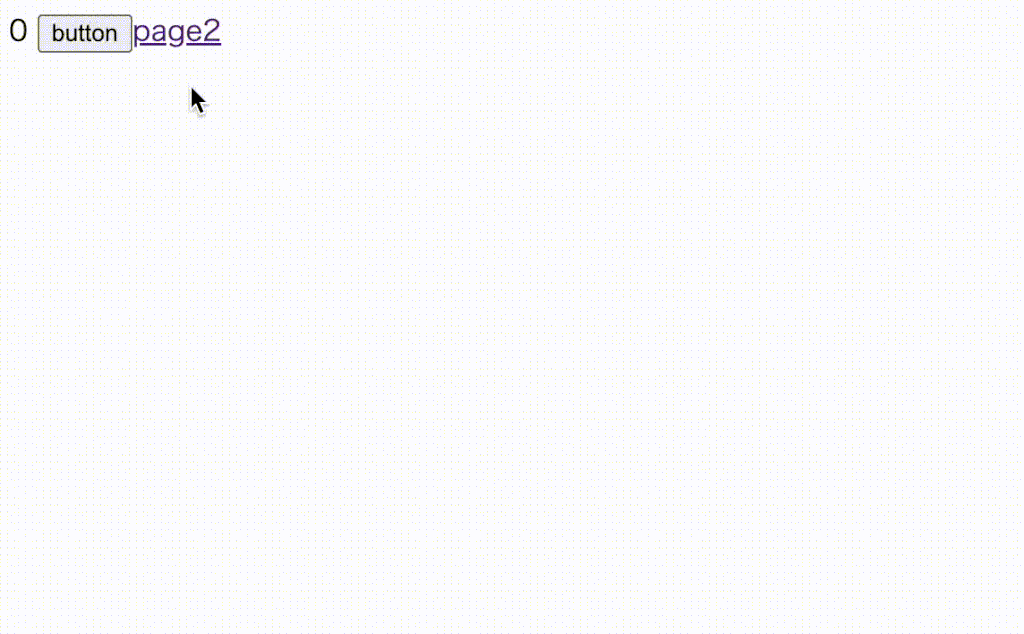
参考資料

Nuxt.js | Pinia
Intuitive, type safe, light and flexible Store for Vue
pinia.vuejs.org
コメント